
It’s the most wonderful time of the year! It’s also that time of year where teachers have an ever growing list of things to do. There is so much to keep track of from grades, testing, and paperwork to holiday programs, class parties, and gifts. My hope is that my blog will at least give you one less thing to worry about: gifts.
Read on for a fun winter craft doubles as an adorable keepsake for parents to love! This craft is great for students in the classroom and at home.
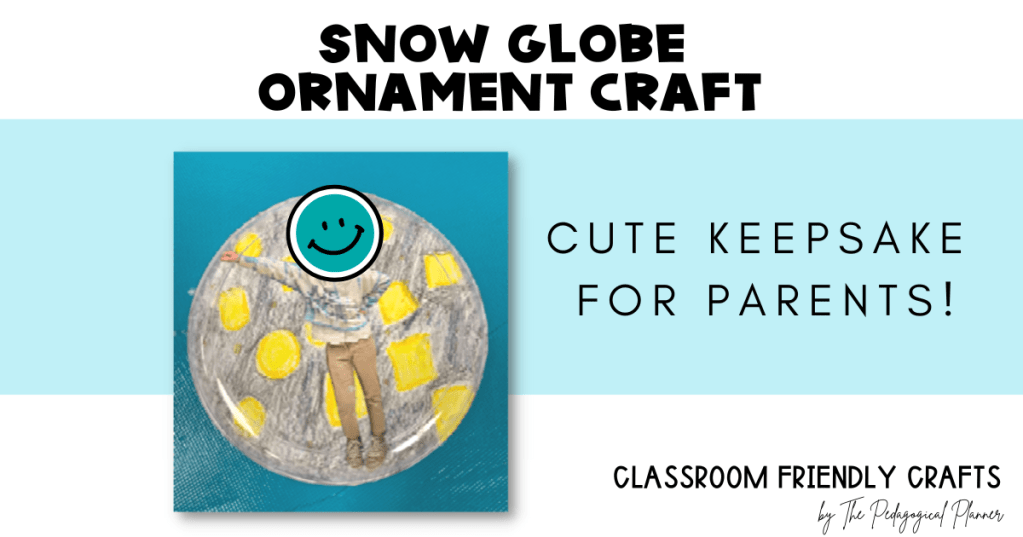
Snow Globe Ornament Craft: Fun for Kids + The Perfect Parent Gift
Your students will have so much fun with this snow globe ornament craft, and it is the perfect Christmas gift for parents! Plus, it is super cheap to make. Almost all of the materials for this craft can be purchased from the dollar store.
Although there are ornament craft kits you can buy, they can be pricey. The kits also have a tendency to sell out or get delayed around the holidays, which is how I discovered this craft in the first place!
These impromptu snow globe ornament crafts are pretty simple to make, and they turn out so cute! Have your students pose for a picture they would like to use for their snow globe. The kids then get to draw and color their own winter background for the snow globe before gluing their photograph onto the background. Add a pinch of “snow” and glue the top on and your students have their snow globe! The final step is the attach a ribbon for an adorable ornament and precious keepsake for parents.
You will need clear plastic plates from the dollar store. You will also need white card stock paper and artificial snow. If you would like for the snow globe to be an ornament, you could also buy ribbon to attach to the snow globe. A full list of materials and steps to make the ornament can be found below.
What if not all my students celebrate Christmas?
Luckily, this craft can be easily adjusted from a Christmas craft to a winter craft! Last year, I had two students who did not celebrate Christmas. Instead of attaching ribbon for an ornament, we left the craft as a snow globe. It was such a fun winter craft that the whole class was able to enjoy! I highly recommend making this small adjustment for culturally diverse classes.
How can I make this craft educational?
While it’s easy to get carried away with arts and craft during the holidays, it’s important to be mindful of the rigorous standards teachers need to help their students meet. An occasional art project or craftivity won’t hurt as long as it is somehow rooted in a lesson being taught in class.

My favorite way to make this craft educational is by tying it in with a read aloud. There are so many fun winter children’s books that could be used with this snow globe craft. I recommend Snow Globe Wishes by Erin Dealey or The Snow Globe Family by Jane O’Connor.
Snow Globe Wishes
Snow Globe Wishes is about a girl and her family taking a pause to cozy together during a big snowstorm. This is the perfect read aloud for a snowy day. Some great teaching points for this story are listed below:
- Making Predictions
- Rhyme and Poetry
- Theme
The Snow Globe Family
The Snow Globe Family is a fun winter story about a tiny family that lives in a snow globe. There are plenty of great teaching points for this book:
- Compare & Contrast
- Story Elements
- Sequencing
How to Make the Snow Globe Ornament
Now that we’ve tied in some fun lesson ideas and possible twists on this fun craft, let’s get started with how to make the snow globe ornament.

Materials
- You will need small clear plastic plates (under 6 inches). I prefer these plates from Dollar Tree.
- A package of white cardstock paper is needed for the background. Cut cardstock pieces in the shape of a circle the same diameter as the clear plastic plates
- A small package of artificial snow is needed for the inside of the globe. Only a pinch of “snow” is needed for each globe. I’ve been using the same bag for all my students for the past 6 years, and I still have a LOT left over.
- You will need a photograph of each child. I usually take the photos using my phone and have them printed at Walgreens.
- If you would like to make the snow globes into ornaments, you will need ribbon (4-6 inch pieces).
- You will need Elmer’s glue or other liquid school glue. Any brand is fine!
- Hot glue gun and glue sticks
- I recommend using crayons, markers, or colored pencils for students to decorate the background of the snow globe.
- Scissors are needed to cut the cardstock and photos.
- A plastic sheet, drying rack, or other flat surface is needed to allow ornaments to dry .
Directions
Teacher Prep
First, you’ll want to take photos of each of your students “posing” as if they were inside of a snow globe. You can get the photos printed however you prefer. I usually get mine printed at Walgreens.
You’ll also want to prepare the cardstock by cutting pieces into the shape of a circle to match the same diameter as the clear plastic plates. I usually take one of the clear plastic plates and use it to trace the circle onto the cardstock before cutting it.
If you are making the snow globes into ornaments, you may want to cut the ribbon into pieces for each student ahead of time. Each ribbon piece should be about 4-6 inches.
Craft Step-by-Step
Step One: Have each student decorate the circular cut piece of cardstock with crayons, colored pencils, or markers. Remind students that it should resemble how they want the background of their snow globe to look. Keep in mind that their photo will be placed in the center of the cardstock, so have them avoid any drawings they wouldn’t want covered up in the center.
Step Two: Give each student their photo to cut the body from the background. Students will attach the body of their photo to their piece of cardstock after decorating. I normally have the kids attach their photo with a piece of tape to delay the mess, but you could have students glue it to the cardstock as well.
Step Three: Place a pinch of artificial snow on the center of each student’s cardstock globe background.
Step Four: Use liquid school glue (yes, the Elmer’s glue) around the edge of the cardstock to attach the clear plastic plate to the top of the cardstock snow globe background. It will be messy, and you will need a generous amount of glue around the outside!
Step Five: Carefully place the snow globes to dry on a flat surface. I recommend leaving the snow globes to dry for a couple of days! I usually do this craft with students on a Friday and leave them to dry in the classroom over the weekend.
Step Six: Once the ornaments are dry, use a hot glue gun to attach a looped ribbon to the snow globe to make it into an ornament.
If desired, allow students to wrap their ornament as a Christmas gift for family!

I hope you enjoy!


Leave a comment